Showing posts with label paint. Show all posts

Tuesday, May 22, 2012

And, She's Back!

Well, this is just sad. Do you ever have things that you just keep putting off and the longer you put off, the more guilty you feel about starting back up? I know; it sounds crazy but that is what has happened with my blog. I got out of the habit of posting and before you know it, five months had gone by!

The good news is, I'm back at it. Now I just hope you'll jump back in with me!

So, what have I been doing the last five months, you ask? Sadly, not much! Posting on this blog is a huge motivator for me, and so hopefully this re-emergence will inspire me to get into action. But, I have done a few things and will be posting about them over the next few weeks.

First, let's start with a project I did one weekend while Landon went out of town. It's actually kind of dangerous for him to leave because that's usually when I decide big changes need to be made. I guess I just have too much time to think while he's away!

This particular weekend I decided it was high time to paint the entry way. When we moved in it was tan, or as I like to call it, band-aid, because that's what it reminded me of. 


I decided that in order to flow well with my dining room, which you may remember we painted a dark gray, I would paint the entry way a lighter shade of gray. And so, having been inspired by all the "light and airy" paint colors I have seen lately, I decided to pick a pale shade.

Now, my first mistake was rushing this project. I literally decided on Friday I would paint over the weekend. That would have been fine except for the fact I didn't have a color picked. 

I threw up a few paint swatches on the wall. After looking at them with the door open and natural lighting coming in as well as with the overhead light, I finally picked Benjamin Moore's "Horizon." Then, I headed to Home Depot to have them color match it. Since I didn't want to have to paint more than one coat, because I was being lazy, I opted for Behr's paint and primer mixture (actually, I decided on Glidden's brand but the machine wouldn't mix it so Home Depot gave me the more expensive Behr paint for the same price ... score!)

So, on Sunday, I prepped the room and began painting and it soon became apparent that perhaps I picked a color too light and airy.


I thought, as with my past painting fiascoes, I would let it sit and dry, hoping it might darken. 

It didn't.

So, when Landon returned home the next day, I asked him what he thought. He didn't say much, which indicated he wasn't a fan. So, the next weekend, I thought I'd give it a second coat -- the one thing I was trying to avoid -- thinking that might help.

It didn't.

So, at this point, I decided I, once again, missed the mark on choosing paint colors. Seriously, between this and the bedroom "cotton candy blue," I'm about to give up.

But, I've decided the light gray is not something I can't live with. It may not be exactly what I wanted but it's not horrible. Plus, the bottom wainscot needs a new coat of white paint, and I do think that might help.

So, here is my new entry way in all it's glory ... in some of these pics, it looks white. There just really isn't enough contrast, but it is what it is!


I can tell you the room really lightened up, which was my goal! Oh, and see the gold chandelier? Let's just say that will be receiving a fresh coat of black spray paint very soon!

Have you found any great paint colors lately? My bedroom still has six different colors on the wall. It's about time to make a decision, and I'd love to know what has worked for you.


Tuesday, October 25, 2011

A Perfect Weekend and Color Choices

Well, yesterday, I waved goodbye to my parents as they drove back to Nashville. We had such a good time while they were in town! To be honest, we didn't do anything huge. Dad had a conference to work on Thursday and Friday, which gave mom and I some great mother-daughter time, which we often don't get when I come to Nashville because there are so many people to see.

We had perfect weather the majority of the weekend with temps in the mid to high 80s. Mom and I explored around town a little and discovered great little shops in downtown Plano, including a bake shop called Bake Rejoice. The cakes were amazing and we enjoyed sitting with a cup of coffee and just chatting as the bakers made magnificent works of art around us.

The next day, we decided to visit McKinney Main Street. We were so surprised to see how cute the downtown square was. It was a perfect day for popping in and out of stores. In one of the stores, I saw a cute little crocheted hat, which prompted mom to teach me how to crochet the next day! So, expect to see some of my creations soon ... well, as soon as I get better at it.

Overall, it was a great visit, and I am so glad they could come. I can't wait for them to come back soon!

Tonight, Landon's parents are coming into town, so we are looking forward to another great visit. I'll let you know what we discover while they are in town!

Oh, and remember the three things I wanted to get done before our guests arrived? Well, one of them did not get done. Because the dining room chairs took so long, I did not get the master bedroom painted.

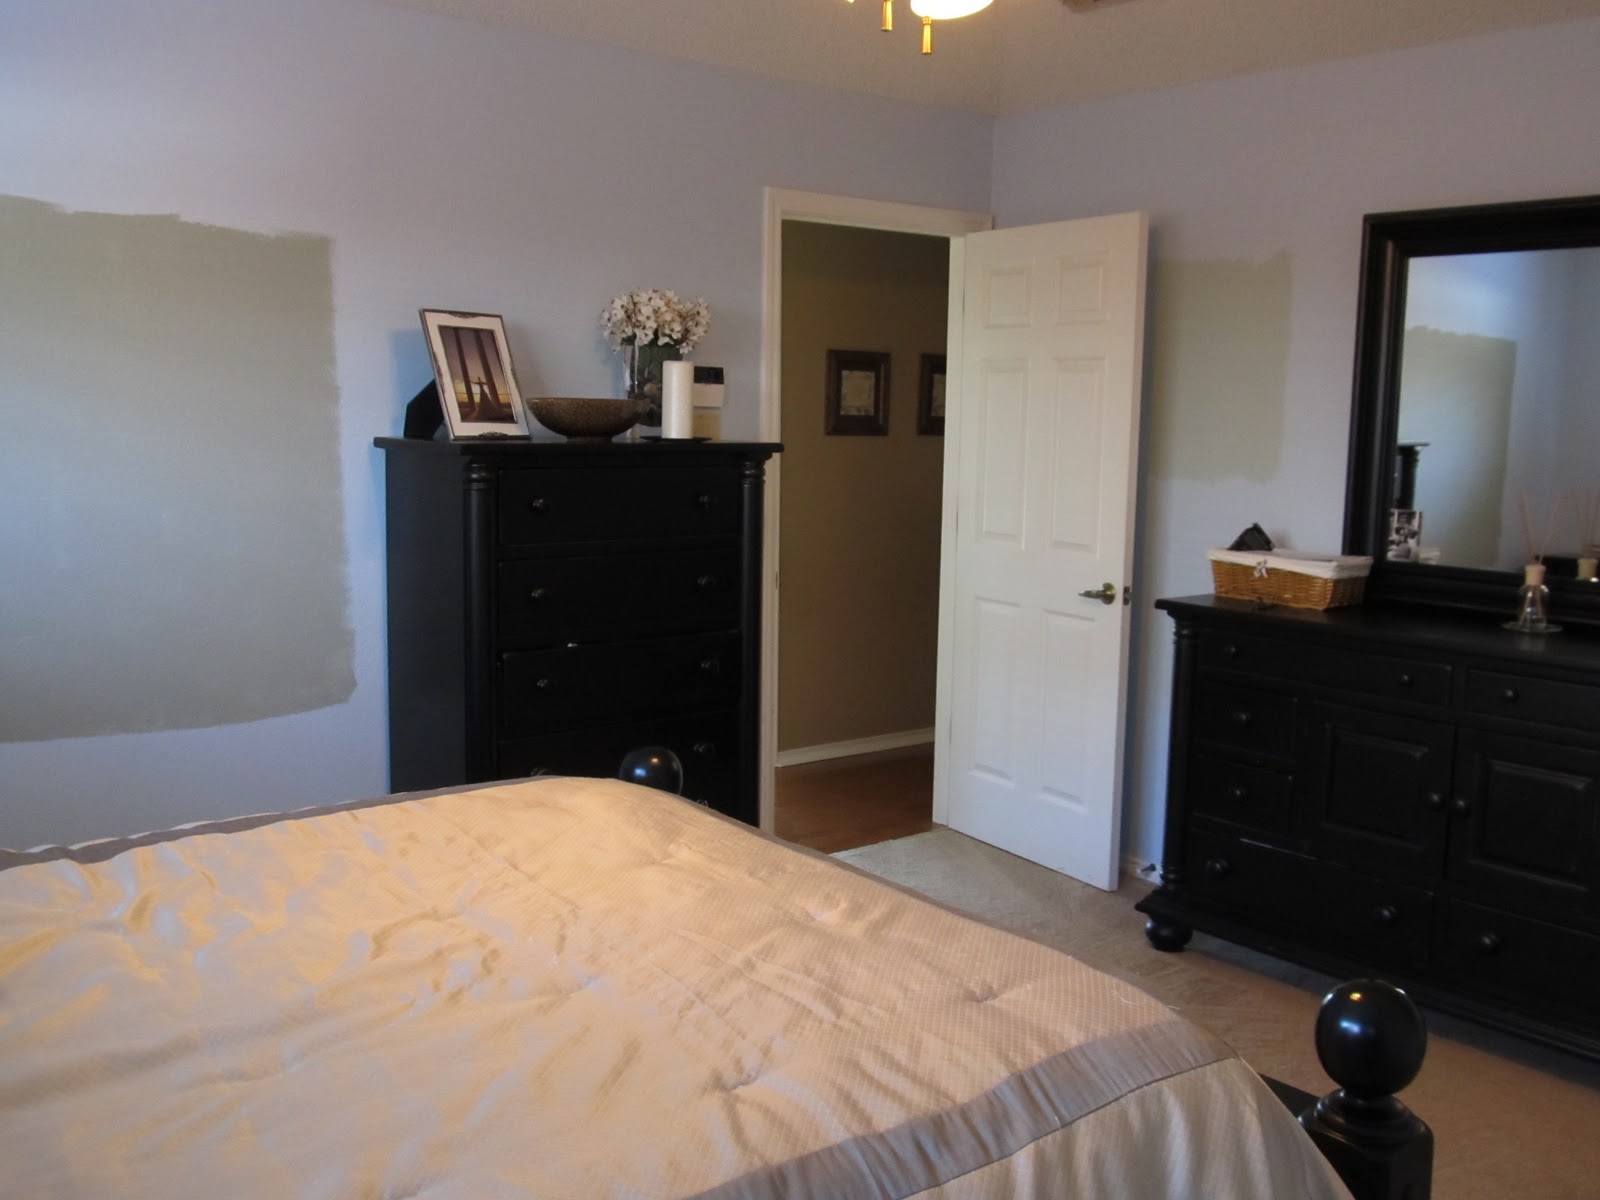
Still, I thought I would show you the colors we were considering. I know they are all very similar, but we've chosen the one we want. Can you guess?


I'm not going to reveal just yet. You'll have to wait and see!


Thursday, September 8, 2011

Huge Paint Fail

Remember all that talk about me reading up on design rules in an effort to make myself have a better eye? Well, it obviously failed.

I have been looking for the perfect paint color for my bedroom for over two months now. I started first with placing various paint chips on the wall. After going through every brand of paint and tons of chips, I finally decided to try out Valspar's La Fonda Mirage.

Knowing that colors shouldn't be judged by their paint chips, I bought a sample and put it on my wall only to realize that it was more sea foam green than beautiful, relaxing spa-like green. It was not what I wanted. 

So, I decided to switch from green to blues, thinking that would be a safer bet. This time I grabbed three paint samples and slapped them on the wall.


After living with these for a week, Landon and I finally decided that we liked the bottom color best - Martha Stewart's "Heavenly Blue." And, we spent several hours on Labor Day painting on our Heavenly Blue. Two gallons of it, to be exact. 

Well, all I can say is that it is anything but "heavenly." It looked so great on the little 8 x 12 swatch I painted on the wall, but in mass quantity, it is just too much.

At first, I thought it would look better when all the furniture was moved back in place. When that didn't make me feel better about it, I thought perhaps a good night's sleep would help. Not so much. 

I will say, when I got home from work Tuesday, I realized I might be making it worse in my head than it actually is, but it still hasn't grown on me. I don't expect it will. 

Before I show you a pic, let me paint you a word picture. Think blue cotton candy. Landon said it reminds him of baby blue. Regardless, it's got to go.

Here's the before.

 
It's amazing what lighting can do, because in this first picture I took, I didn't think it looked too bad.


But then I took some others and this "Heavenly Blue" showed its true colors ...


It's funny, because when I first started looking at paint colors, I told Landon I wanted something "lighter" than our original green. Well, what I got was something brighter. Lighter does not mean brighter. Also, I went from a warm color to a cool color, and I determined that is one of the reasons I don't like this color.

I can't believe I made such a huge mistake. I know everyone always says that painting is the easiest way to update a room, but I do not believe painting is easy. I think it's a lot of work, and it's not something I enjoy. But, I guess if I'm going to make a major mistake, this is the one to make because it is, at least, fixable.

So, I'm back on the hunt for the perfect paint color, and I'm open to any suggestions you might have. I am most drawn to warm blues and greens. I've been searching on Favorite Paint Colors for a few ideas. I'd like to make a decision by the weekend so I can remedy this mistake quickly. But, if I can't make it by Saturday, then I'll have to wait two weeks because I'm out of town for work next weekend. I really don't think I can live with "Heavenly Blue" for that long, but we'll see.


Wednesday, February 23, 2011

Tray Changes

I look at a lot of blogs on a daily basis and one of them is Centsational Girl's blog. The other day I was really inspired by the sweetheart tray she posted about. I actually have a little wooden tray in my house that you may have seen in some of my past guest room photos:


I thought, "Why not paint it white and add a new twist to it?" So, that's exactly what I did last weekend ... well, at least the painting white part!


Phase two will be to stencil the bottom. I bought this stencil at Michael's and some black paint, which I'm planning on using.


Not sure if I'll use the stencil just once in the middle of the tray bottom or both on the top and bottom of the tray bottom. We'll see. Once I get it stenciled, I'll also put a coat or two of sealant on it, so that it will last.

Monday, February 21, 2011

Bedside Table Reveal

Last week, I told you about my yard sale project. Well, I finally got it done on Saturday. Here's what it looked like before:


I used Young House Love's suggestion on how to paint it, which included starting by sanding everything down and then applying an oil-based primer. Next, I applied two coats of Glidden's Toasted Oatmeal, followed by a sealant. It all was very easy. As suggested, thin coats are the key. You don't want to goop it on or you will have a mess.

Here's what it looks like now:


I love it! Now, I have a cute bedside table in my guest bedroom.


I haven't placed anything on it yet because I want to give it plenty of time to dry so as not to mess it up. I will be adding an alarm clock and maybe a book or two for guests to flip through. I'd love to put a small lamp, too, but don't want to fill it up so much that it's completely full. I may have to look for a reading lamp at IKEA that will go on the wall.

I have one more planned project for this room and still need to buy a few more pillows, but I'm liking how it's coming together!


Wednesday, February 16, 2011

Yard Sale Project

Sorry it's been a while since I've posted. I had such a busy weekend and the week started off with a bang, too. 

Per my post last week, you are probably wondering if I got around to painting anything this past weekend (and if you aren't wondering, well, I'm still going to tell you!) ...

I did spend much of Saturday tackling a small project. You know that I bought a table on Craig's List and am planning on completely redoing it. It's an ambitious goal, but one I'm very excited about. Still, I made that goal having really never painted or refinished any wooden furniture. So, I thought Saturday was a good time to test my skills on a smaller piece of furniture.

Back before Christmas, I had a Saturday early morning choir practice. I promised Landon I'd pick up lunch on my way home, but little did he know I would bring home a little more. Right next to the Jimmy John's restaurant, there just happened to be a yard sale. So, I walked over intending to look at a leather footstool, which ended up not being in the best shape. But, then I happened upon a little table that I thought would be just perfect for my guest room night stand. 
 

It's simple but with a little paint, I thought it could look great. Being at the end of the yard sale, the women were pretty ready to get rid of things. I offered $5, but after realizing I only had $2 and some change in cash, they were gracious enough to take just that! I figure for $2 something, it was a really good deal.

Currently, I'm using a dresser beside the bed, which you can see in this post, but it's doesn't work as a bedside table because it's too tall. This table should be perfect.

So, I did paint it this weekend, but unfortunately, I didn't get to finish the process, so I don't yet have a pic! But, that will be the first thing I do Saturday morning (or one night if I can get home from work before dark) so I'll have a post all about the process with pics soon!

The good news is, the process wasn't difficult, so it gave me hope that I can indeed tackle the dining room table soon!

Have you ever painted a piece of furniture? Any good tips?

Tuesday, January 25, 2011

The Big Reveal ... Dining Room

If you are looking for a workout, I highly recommend painting! My legs haven't been this sore in a long time (which may reveal how out of shape I am).

As I already mentioned, Landon and I painted the dining room this weekend and I couldn't be more thrilled with how it turned out. If you'll remember, we decided to go with a dark grey after testing out a few shades. It definitely darkened the room, but I think it gives it that "dark, dramatic" look I wanted.

Here is the room all prepped and ready for painting:


We had read that if you'll put some holes in the rim of the paint can, it will help not leave a gooey mess of dried paint around the rim, so we thought we'd give it a try. 


It did work, but we probably should have put a few more holes in it. 

Landon and I have a good routine for painting, which is I handle the trim and he rolls. That worked great until I got a little slow on the job (I trim by hand with a paint brush), so Landon started trimming around the ceiling while I did around the baseboards. In the end, we got it done in a relatively quick time frame. Because the paint was so dark, we didn't need to prime and only had to put on one coat.

Once the paint dried, I was able to unpack our final boxes, at last, which was my china. (Notice the "original" boxes from when we got married nearly six years ago. Those have stayed with us through ALL our moves, which have been a lot!)


And, I was able to put my china in my china cabinet. This is a really special piece of furniture to me, because my dad made it for my mom when they got married. When he made her a newer one right before I got married, I laid claim to this one. I love it not only because it's beautiful but also because I think of my sweet dad every time I see it!


And, now, the dining room is one step closer to being done! Here it is with the new grey walls. I  already love it, especially with my black chandelier! I think it's going to look great when the dining room table gets done and we hang some things on the wall.  Oh, and I'm on the lookout for curtains, too. I have a few ideas but haven't exactly decided what I want yet. I'm open to any thoughts you have!


Sunday, January 16, 2011

Chic Chandelier

When we first bought our house, I saw the brass chandelier in the dining room as a piece with lots of potential.
Not the best pic, I know, but it's the only "before" pic of it hanging that I have!
I knew I wanted to give it a face lift with a fresh coat of black paint. So, last weekend, we decided to make this happen.
First things first, we had to take it down and remove all the crystals. I enlisted Landon's help for this task.

Having never painted a chandelier, I also thought it would be wise to peruse the World Wide Web for a few pointers. One great tip I found was from the Karla's Cottage blog, which said to screw in burnt-out light bulbs so that you don't have to tape up the sockets. I thought this sounded like a great idea, and it was, though you will see in a few minutes that I ran into one little problem. I didn't actually have any burnt-out light bulbs, but had some nightlight bulbs that I no longer needed.

I realize how dusty the chandelier was until I took this picture ... ewww. So, I also took the time to wipe it down. Much better!

Once I cleaned the entire chandelier off, I taped off the wires and moved it out to the garage for the first coat of primer.

I must tell you that I didn't realize there were so many types of spray paint primers at Home Depot. I wasn't quite sure which one to get but I decided on Rust-oleum's Clean Metal Primer. It worked really well, as far as I know! The only caution I would give is that it does leave a sticky finish. I had on an old pair of tennis shoes, which I'm sure will be forever sticky on the bottom!

Because of the many nooks and crannies on the chandelier, I had to turn it a few times and add several coats. For the second coat of primer, I thought I would try placing the chandelier in a box to spray it. I had seen this on one of the websites.

It did help with the containing the spray paint, but this is where the light bulb idea got me into trouble. See, I first placed the chandelier upside down in the box so I could get the bottom covered, and when I did, one of the bigger bulbs ended up breaking off. Hmm ... so I taped it up and kept on going, this time without the box. (Once it was all done, I was able to easily get the remainder of the bulb our with a pair of pliers, so it ended up being fine.)

I will say that one of the hardest parts of this job was waiting on the coats to dry :) Yes, I'm impatient! So, in between coats, I decided to clean off the crystals. Once again, I didn't realize how dirty they were until I started this process. I just put them in a bowl in the kitchen sink with a little dish detergent and hot water. It worked wonders!

That took just enough time that I was ready for my first coat of black spray paint. I chose to use Rust-oleum's Universal Hammered Spray Paint. It gave a great coverage. After two coats, here is my finished product.


You might notice the little "bubbles" on the chandelier. I'm not sure what the problem was, but I've deducted it was one of three things:

1) I did this last Saturday on a 60 degree day but the temperature was dropping throughout the day (you may remember it snowed the next day). By the time I put the black on, it was a little chilly. It could have been too cold for the spray paint.

2) Because of the cold, I may have rushed the last step, so it may not have had enough time to dry in between each coat.
3) I may have put the coats on too thick.


Well, it may not be perfect, but I've now learned. (Oh, I might not have mentioned, either, that this was my first spray paint project, ever ... as in, in my entire life. So, I figured for the first time, it didn't turn out too bad. Plus, once it was hung, with all the crystals added, you cannot see those bubbles!) What do you think?

I think it's going to look amazing with our dark grey walls! I also have a smaller chandelier very similar to this one in the foyer. I'll be painting it, too, once it warms up, so I'll have another opportunity to give it a go without the end "bubbles."